canon rebel t1i instruction manual

Welcome to the Canon Rebel T1i instruction manual. This guide helps you master the 15.1 MP DSLR camera, featuring a CMOS sensor, DIGIC 4 processor, ISO 100-3200, Full HD video, and built-in flash.
Key Features of the Canon Rebel T1i
The Canon Rebel T1i is an entry-level DSLR featuring a 15.1 MP CMOS sensor, DIGIC 4 Image Processor, and ISO range of 100-3200 (expandable to 6400). It supports Full HD video recording at 1080p, Live View mode, and continuous shooting up to 3.4 fps. The camera includes a 3-inch LCD screen, built-in flash, and compatibility with Canon EF-S lenses. Its lightweight design and user-friendly interface make it ideal for beginners and hobbyists, while advanced features like manual controls and RAW image capture cater to more experienced photographers. This versatile camera balances simplicity with powerful capabilities.
First Impressions and Overview
The Canon Rebel T1i offers a seamless blend of simplicity and advanced features, making it ideal for both beginners and enthusiasts. With its ergonomic design and lightweight body, the camera feels comfortable in hand. The 3-inch LCD screen provides clear image preview and menu navigation. Its intuitive controls and user-friendly interface make it easy to explore creative possibilities. The T1i delivers excellent image quality, thanks to its 15.1 MP CMOS sensor and DIGIC 4 processor, while features like Full HD video recording and Live View mode enhance its versatility. A great choice for capturing life’s moments with ease and precision.
Product Overview and Specifications
The Canon Rebel T1i features a 15.1 MP CMOS sensor, DIGIC 4 processor, ISO 100-3200, and 3;4 fps continuous shooting. It supports Full HD video recording and offers a 3-inch LCD screen with Live View functionality. The camera includes a built-in flash, 9-point AF system, and compatibility with EF/EF-S lenses. Its compact design and robust feature set make it versatile for photographers of all skill levels, delivering high-quality images and videos in various lighting conditions.
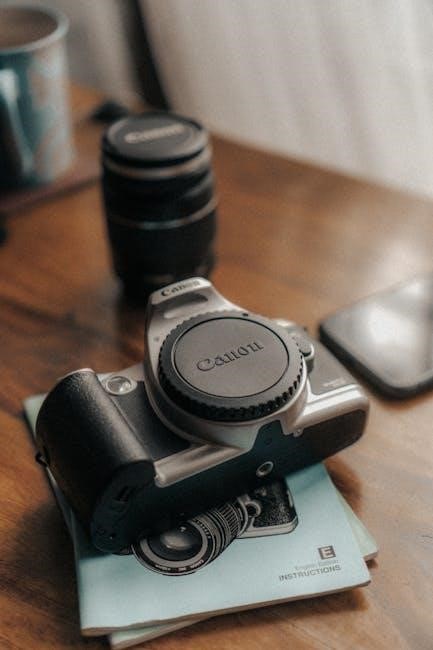
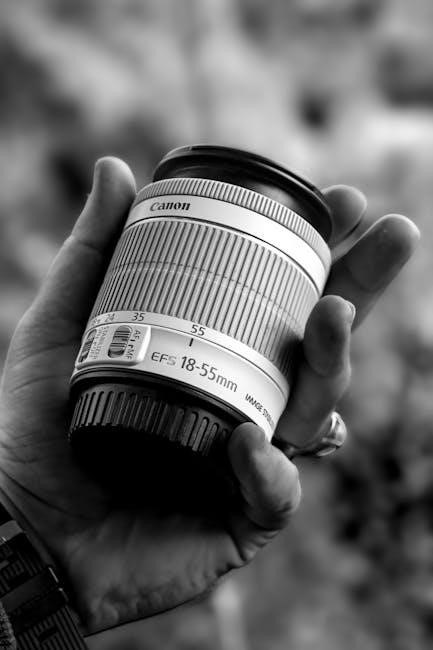
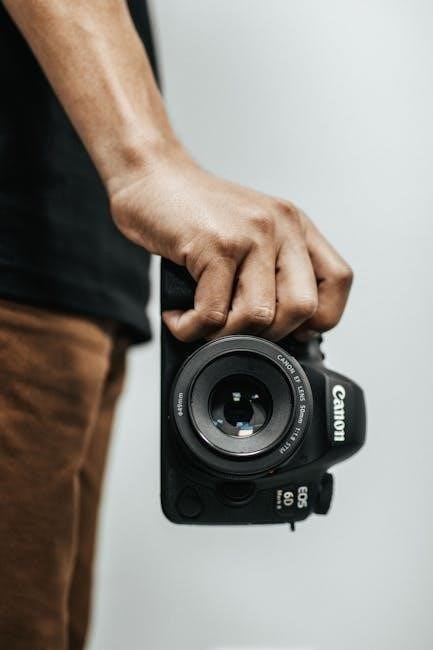
Canon EOS Rebel T1i Camera Components
The Canon EOS Rebel T1i features a 15.1 MP CMOS sensor, DIGIC 4 Image Processor, and a 3-inch LCD screen for preview and playback. It includes a built-in flash, hot shoe for external flashes, and a 9-point autofocus system. The camera supports EF/EF-S lenses, offering versatility for various shooting needs. It also includes a memory card slot for SD/SDHC cards, a viewfinder for precise framing, and external ports for USB and video output. These components work together to deliver high-quality imaging and enhanced functionality for photographers.
Technical Specifications and Capabilities
The Canon EOS Rebel T1i boasts a 15.1 MP CMOS sensor, capturing images up to 4752×3168 pixels. It offers ISO sensitivity from 100 to 3200, expandable to 6400. The camera supports continuous shooting at 3.4 fps and features a 9-point AF system. Full HD video recording is available at 1080p, with HDMI output for playback. The DIGIC 4 processor ensures efficient image processing and noise reduction. These specifications make the T1i suitable for both still photography and HD video recording, catering to enthusiasts and professionals alike.
Setting Up Your Canon Rebel T1i
Unbox and charge the battery, then insert a memory card. Power on and follow the setup wizard for language, date, and time. Familiarize yourself with controls.
Unboxing and Initial Setup
Begin by carefully unboxing your Canon Rebel T1i, ensuring all components are included. Charge the battery using the provided charger until the indicator turns green; Insert a memory card into the slot on the camera’s right side. Power on the camera and follow the on-screen setup wizard to select your language, set the date and time, and choose other initial preferences. Familiarize yourself with the camera’s exterior, including the mode dial, shutter button, and control buttons. Ensure the camera is properly updated and ready for first use.
Charging the Battery and Inserting the Memory Card
Charge the battery using the provided LC-E10 charger until the indicator turns green. Once charged, insert the battery into the compartment on the camera’s bottom. For the memory card, open the slot on the camera’s right side and gently insert a compatible SD/SDHC card. Ensure the card is properly secured and formatted in the camera for optimal performance. Always use a recommended memory card to avoid compatibility issues and ensure smooth operation of your Canon Rebel T1i.
Understanding the Camera Modes
The Canon Rebel T1i offers a range of shooting modes, from fully automatic to manual, allowing users to capture stunning images with ease, creativity, and precision.
Auto Mode for Beginners
The Canon Rebel T1i’s Auto Mode is designed for beginners, simplifying photography by automatically adjusting settings like aperture, shutter speed, and ISO for perfectly exposed images. This mode is ideal for casual shooting, allowing users to focus on composition and creativity without technical complexities. The camera’s advanced DIGIC 4 processor ensures optimal results in various lighting conditions. For new photographers, Auto Mode offers a stress-free way to capture sharp, vibrant photos while learning the basics of photography. It’s a great starting point before exploring more advanced modes.
Creative Modes (AV, TV, P)
The Canon Rebel T1i offers Creative Modes—Aperture Priority (AV), Shutter Priority (TV), and Program Mode (P)—designed for intermediate photographers seeking more control. In AV Mode, you set the aperture, controlling depth of field, while the camera adjusts shutter speed. TV Mode allows you to set shutter speed for motion effects, with the camera adjusting aperture. Program Mode (P) offers enhanced flexibility, letting you adjust settings like ISO and white balance while the camera balances exposure. These modes bridge Auto and Manual, providing creative freedom without full manual control, making them ideal for refining your photography skills.
Manual Mode for Advanced Users
Manual Mode (M) on the Canon Rebel T1i grants full creative control, allowing users to independently adjust aperture, shutter speed, and ISO. This mode is ideal for experienced photographers who want precise control over exposure. The camera does not automatically adjust settings, enabling users to fine-tune every aspect of their shot. Use the main dial to set shutter speed and the AV+/- button with the dial to adjust aperture. The exposure level indicator on the LCD ensures balanced settings for optimal results, making Manual Mode perfect for advanced photographers seeking ultimate customization and control over their images.

Focusing and Metering
The Canon Rebel T1i features a 9-point autofocus system and multiple metering modes, including Evaluative, Center-Weighted, and Partial, ensuring precise focus and exposure control for optimal results.
Autofocus Modes and Settings
The Canon Rebel T1i offers versatile autofocus modes to suit various shooting scenarios. One Shot AF is ideal for stationary subjects, focusing once and locking the point. AI Servo AF continuously tracks moving subjects, while AI Focus AF automatically switches between One Shot and AI Servo. The 9-point AF system ensures precise focus, with the option to manually select focus points using the cross keys. Pressing the AF point selection button and using the Set button confirms your selections. This system allows for dynamic control over focus, enhancing your photography experience.
Manual Focus and Metering Options
The Canon Rebel T1i allows for manual focus control, enabling precise adjustments for creative purposes. Metering options include Evaluative, Center-Weighted, and Spot modes, each suited for different lighting conditions. Evaluative metering analyzes the entire scene, while Center-Weighted focuses on the center area. Spot metering measures light from a specific point, ideal for high-contrast situations. Additionally, the camera supports manual ISO adjustments and built-in flash for enhanced exposure control, giving users flexibility to refine their shots and achieve desired results in various lighting environments.

ISO and Noise Reduction
The Canon Rebel T1i offers an ISO range of 100-3200 (expandable to 6400) for optimal performance in various lighting conditions. Built-in noise reduction features minimize grain, ensuring crisp, clean images even at higher sensitivities.
Adjusting ISO Settings for Different Lighting Conditions
The Canon Rebel T1i allows you to adjust ISO settings from 100 to 3200, with an expansion to 6400 for extreme low-light situations. Lower ISOs (100-400) are ideal for bright lighting to avoid overexposure and preserve detail. Higher ISOs (800-3200) are better suited for dimly lit environments, though they may introduce digital noise. The camera features built-in noise reduction to minimize grain, especially in high-ISO shots. Experiment with ISO settings to balance image quality and lighting conditions for optimal results. Use a tripod in low light to stabilize the camera and reduce blur.
Noise Reduction Features and Best Practices
The Canon Rebel T1i incorporates noise reduction features to minimize grain in high-ISO images. Enable the Long Exposure Noise Reduction for shots taken at slow shutter speeds and High ISO Noise Reduction for ISOs above 800. For best results, use a tripod to stabilize the camera in low light. Shoot in RAW format to maintain image quality and apply noise reduction in post-processing. Avoid over-reliance on high ISOs and use external lighting when possible to ensure crisp, clean images with minimal noise.
White Balance and Color Settings
The Canon Rebel T1i offers various white balance presets (Auto, Daylight, Shade, Tungsten, Fluorescent) and allows custom settings using a reference object for accurate color rendition.
Understanding White Balance Presets
White balance presets on the Canon Rebel T1i help capture accurate colors under different lighting conditions. Options include Auto, Daylight, Shade, Tungsten, Fluorescent, and Cloudy. Each preset adjusts color temperature to match the light source, ensuring natural tones. Auto mode automatically detects and adjusts, while Daylight is ideal for outdoor shooting. Shade and Cloudy add warmth to counteract cool tones, and Tungsten and Fluorescent correct for artificial light sources. Using the right preset enhances image quality and reduces unwanted color casts.
Custom White Balance and Color Temperature
Custom white balance on the Canon Rebel T1i allows precise color accuracy by setting a specific white balance based on shooting conditions. To set it, aim the camera at a white or gray object under the light source, fill the frame, and press the WB button. The camera will adjust to the lighting’s color temperature. Additionally, you can manually adjust the color temperature (2500K–10000K) to fine-tune hues. This feature is ideal for achieving consistent colors in controlled environments or artistic effects. Use a gray card for accurate results.

Using the Built-In Flash
The Canon Rebel T1i features a built-in flash for added lighting in low-light conditions. It automatically pops up and fires, providing well-lit images without needing an external unit.
Flash Modes and Settings
The Canon Rebel T1i offers multiple flash modes, including Auto, Manual, and Red-Eye Reduction. Auto mode automatically adjusts flash output for optimal lighting. Manual mode allows precise control over flash intensity, enabling adjustments from 1/1 to 1/128 power. Red-Eye Reduction minimizes red-eye effects in portraits by emitting a pre-flash before the main flash. Additionally, the camera supports flash exposure compensation, letting you fine-tune brightness to achieve natural-looking results. These modes and settings provide flexibility for various lighting scenarios, ensuring well-balanced and professional-looking images.
Best Practices for Using the Built-In Flash
For optimal results with the Canon Rebel T1i’s built-in flash, use it in low-light conditions or to fill shadows in sunny settings. Avoid using the flash at extreme angles or distances beyond its range (approximately 12-15 feet). To reduce harsh light, bounce the flash off nearby surfaces when possible. Adjust flash exposure compensation to balance brightness and avoid overexposure. Enable red-eye reduction for portraits to minimize unwanted effects. Clean the flash surface regularly to ensure consistent performance. Always sync flash settings with the camera’s mode for seamless results.
Video Recording Capabilities
The Canon Rebel T1i supports HD video recording at 1920×1080 pixels and 20 fps, enabling high-quality capture of detailed scenes with smooth motion and vibrant colors.
HD Video Recording Features
The Canon Rebel T1i offers HD video recording at 1920×1080 pixels with a frame rate of 20 fps, delivering sharp and detailed footage. It supports 720p at 30 fps for smoother motion. The camera uses MPEG-4 AVC/H.264 compression, ensuring high-quality video with manageable file sizes. Users can capture vibrant colors and dynamic range in various lighting conditions. Manual controls during recording allow for exposure adjustments, enabling creative flexibility. The built-in microphone captures stereo sound, and an external microphone jack is available for enhanced audio quality, making it ideal for both casual and advanced videography.
Best Practices for Shooting Video
For optimal video results with the Canon Rebel T1i, use a tripod or image stabilizer to minimize camera shake. Ensure subjects are well-lit, avoiding harsh shadows or overexposure. Use manual focus for precise control, as autofocus may hunt during recording. External microphones enhance audio quality, reducing wind noise. Shoot in manual mode to adjust settings like aperture and shutter speed. Regularly clean the sensor and lens to prevent dust spots. Lastly, use high-speed memory cards to handle HD video files efficiently and avoid interruptions during recording.
Playback and Reviewing Images
Navigate the playback menu to review images, using the cross keys to scroll and zoom in/out. Use the erase button to delete unwanted photos or edit them directly on the camera.
Navigating the Playback Menu
Access the playback menu by pressing the Play button. Use the cross keys or Quick Control Dial to scroll through images. Zoom in/out using the Zoom and Reduce buttons. Press INFO to view shooting details. Use the ERASE button to delete images. Select thumbnails or slide shows for multiple-image views. Rotate images using the cross keys while in playback. Protect images from deletion by setting the protect feature. Customize playback options in the menu for a personalized viewing experience;
Editing and Deleting Images
The Canon Rebel T1i allows basic in-camera editing, such as resizing images or adjusting brightness. Use the cross keys to navigate to the Edit option in the playback menu. Select images to resize or adjust. To delete images, press the ERASE button while viewing a photo. For multiple deletions, use the Check Mark option in the playback menu. Protected images cannot be deleted. Ensure images are saved to a memory card before editing or deleting to avoid data loss. This feature helps manage your photos efficiently while on the go.
Customizing Your Camera Settings
Personalize your Canon Rebel T1i settings to enhance your workflow; Access customization options through the menu system, allowing you to tailor AF, AE, and personal preferences for optimal performance.
Personalizing Camera Settings for Your Workflow
Customize your Canon Rebel T1i to fit your photography style. Access the menu system to tailor settings like autofocus modes, exposure compensation, and white balance presets. Assign frequently used functions to buttons for quick access. Save custom settings as user-defined profiles for specific shooting scenarios, such as portrait or landscape photography. Adjust the camera’s default parameters, like Auto ISO limits or metering modes, to suit your workflow. This flexibility ensures the camera adapts to your creative needs, enhancing efficiency and productivity during shoots.
Saving Custom Settings for Quick Access
To save custom settings on the Canon Rebel T1i, navigate to the camera menu and select the Custom Settings option. Use the Quick Control Dial to scroll through available settings and choose the ones you want to save. Assign a name to your custom profile for easy identification, then confirm the save. This feature allows you to quickly switch between different configurations, such as portrait, landscape, or low-light setups, ensuring efficiency during shoots.
Access your saved profiles in the menu under the Custom Settings section. This convenient feature streamlines your workflow and ensures consistent results across different shooting scenarios, making it ideal for photographers who frequently adapt to varying conditions.
Maintenance and Upkeep
Regularly clean the camera and lens with a soft cloth, avoiding harsh chemicals. Store in a dry, cool place and periodically check for firmware updates.
Cleaning the Sensor and Lens
Regular cleaning of the sensor and lens is essential for maintaining image quality. Use a soft, dry cloth to wipe the lens and camera body. For the sensor, enable the “Clean Manually” option in the menu, then use a hand-held blower or swabs specifically designed for camera sensors. Avoid touching the sensor surface and never use liquids or harsh chemicals. Clean the lens with a microfiber cloth, gently removing fingerprints or smudges. For stubborn marks, dampen the cloth slightly, but avoid direct contact with the lens surface.
Updating Firmware and Software
To ensure optimal performance, regularly update your Canon Rebel T1i’s firmware and software. Visit the official Canon website, download the latest firmware version, and follow the installation instructions provided. Use the EOS Utility software to transfer and install updates. Always back up your settings before updating. After installation, restart the camera to apply changes; Keeping your firmware updated enhances functionality, fixes issues, and ensures compatibility with the latest features and accessories.
Troubleshooting Common Issues
Troubleshoot Common Issues
Troubleshoot common issues by identifying error messages and camera malfunctions. Resetting to factory settings often resolves software-related problems. Consult the manual for detailed solutions.
Resolving Error Messages and Camera Malfunctions
When encountering error messages or camera malfunctions, refer to the manual for specific solutions. Common issues include error codes like “ERR 99,” often resolved by cleaning the sensor or resetting the camera. Switch off the camera, remove the battery, and reinsert it to restart. For persistent issues, perform a factory reset via the menu. If problems persist, contact Canon support or visit an authorized service center for professional assistance. Always ensure firmware is up-to-date to avoid software-related malfunctions.
Resetting the Camera to Factory Settings
To reset the Canon Rebel T1i to factory settings, go to the menu and select the “Setup” option. Choose “Clear Settings” and confirm by selecting “OK.” This will restore default settings, erasing any custom adjustments. Note that this does not affect images stored on the memory card. Resetting is useful for troubleshooting or preparing the camera for sale. After resetting, recalibrate your preferred settings for optimal performance. This process does not resolve hardware issues but ensures software settings return to their original state. Use this feature carefully and only when necessary.

Additional Resources
Access the Canon EOS Rebel T1i PDF manual online for detailed instructions. Visit Canon’s official website for customer support, FAQs, and interactive guides. Explore forums like Manua.ls for additional resources and helpful troubleshooting tips.
Downloading the PDF Manual
To download the Canon Rebel T1i instruction manual, visit the official Canon website or trusted platforms like Manua.ls. The PDF manual, titled EOS REBEL T1i/EOS 500D Instruction Manual, is available for free. Ensure you use Adobe Reader 6.0 or later to view the file without watermarks. The manual provides comprehensive guidance on camera features, settings, and troubleshooting. Downloading the PDF ensures you have constant access to detailed instructions for optimizing your camera’s performance. The file size is approximately 6.06 MB, making it easy to store and reference anytime.
Canon Customer Support and Online Forums
Canon offers extensive customer support through their official website, providing drivers, downloads, and manuals. Online forums like Manua.ls and Canon’s community platform allow users to discuss issues, share tips, and access FAQs. These resources include troubleshooting guides, firmware updates, and user-generated content. Engaging with these forums connects you with experts and enthusiasts, ensuring you get the most out of your Rebel T1i. Visit Canon’s support page or explore forums for personalized assistance and insights to enhance your photography experience.
Master your Rebel T1i and unlock your creative potential. Explore its features, embrace continuous learning, and enjoy the journey of photography with every click.
Final Tips for Getting the Most Out of Your Canon Rebel T1i
Experiment with different shooting modes to understand their strengths. Practice with manual focus for precise control and explore custom white balance for accurate colors. Regularly clean the sensor and update firmware for optimal performance. Utilize the built-in flash for low-light scenarios and take advantage of HD video recording for capturing dynamic moments. Lastly, explore additional resources like downloadable manuals and online forums for continuous learning and troubleshooting.
Continuous Learning and Improvement
Continuous learning is key to maximizing your Canon Rebel T1i’s potential. Explore the downloadable PDF manual and online forums for troubleshooting and tips. Experiment with different modes and settings to refine your skills. Regularly review your photos to identify areas for improvement. Stay updated with firmware updates and explore Canon’s official resources for the latest features and best practices. By dedicating time to practice and learning, you’ll unlock new creative possibilities and enhance your photography journey.