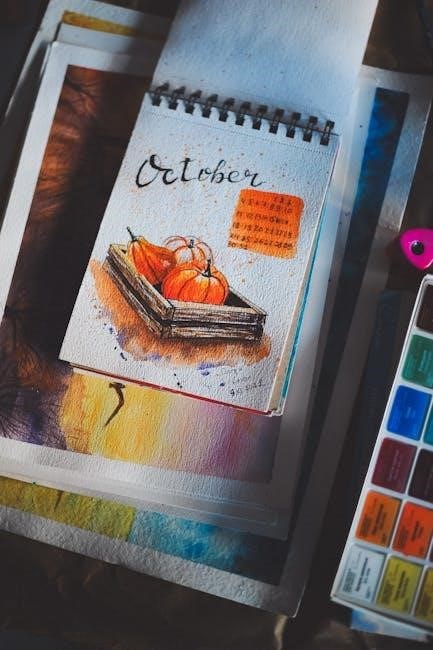
watercolor pumpkin tutorial

Discover the charm of watercolor pumpkin painting, a perfect way to capture autumn’s vibrant colors and cozy atmosphere․ This medium offers fluidity and blending, ideal for all skill levels, making it a delightful creative endeavor for artists of any experience․
Why Paint Pumpkins in Watercolor?
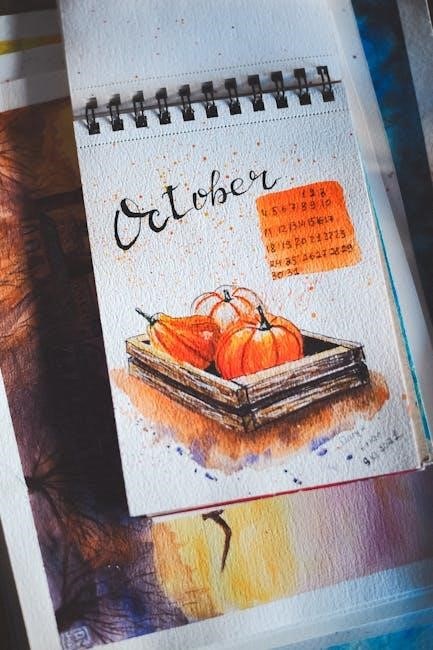
Painting pumpkins in watercolor is a delightful way to embrace the beauty of autumn while exploring the medium’s unique qualities․ Pumpkins, with their rounded shapes and warm colors, are ideal subjects for watercolor, allowing artists to practice blending, layering, and capturing soft, organic forms․ Watercolor’s fluidity brings a sense of movement and life to the painting, making it perfect for depicting the natural texture and vibrancy of pumpkins․ Additionally, watercolor pumpkin painting is accessible to all skill levels, offering a relaxing and creative outlet for both beginners and experienced artists․ It’s a great way to celebrate the season while honing your artistic skills․
The Joy of Autumn-Inspired Art
Autumn-inspired art, particularly watercolor pumpkin painting, captures the essence of the season with its warm, vibrant colors and cozy atmosphere․ Pumpkins symbolize abundance, gratitude, and the beauty of nature, making them a perfect subject for artistic expression․ The fluidity of watercolor allows artists to convey the soft textures and organic shapes of pumpkins, while the medium’s transparency brings depth and luminosity to the painting․ Autumn’s rich palette of oranges, reds, and yellows offers endless inspiration, making it a favorite time of year for many artists․ Painting pumpkins in watercolor is not only a creative outlet but also a way to celebrate the season’s charm and reflect on its themes of harvest and gratitude․
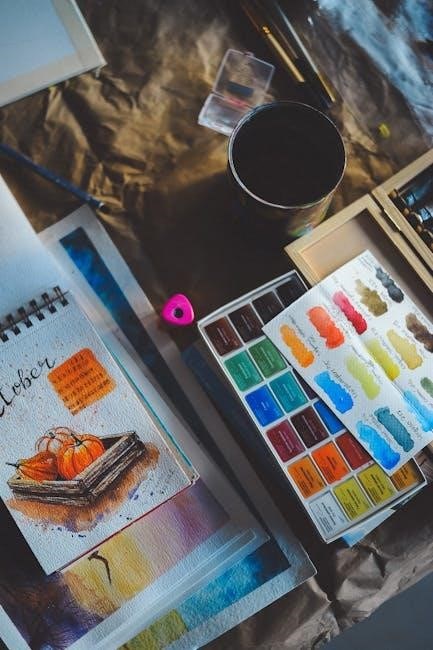
Materials and Supplies Needed
Gather quality watercolor paper, vibrant paints, assorted brushes, and a pencil for sketching․ Additional tools like a spray bottle and blending stumps enhance your creative process․
Watercolor Paper: Choosing the Right Quality
Choosing the right watercolor paper is essential for achieving vibrant, professional results․ Opt for high-quality, acid-free paper with a weight of at least 140lb (300gsm) to prevent buckling․ Cold-pressed paper is ideal for watercolor, offering a textured surface that holds water and pigment beautifully․ Hot-pressed paper, while smoother, is better for fine details․ Look for papers labeled as “100% cotton” or “lint-free” for durability and performance․ Avoid thin or low-quality papers, as they may not handle multiple layers of water and pigment well․ Investing in reputable brands like Canson or Arches ensures superior results․ Proper paper selection is the foundation of a successful watercolor pumpkin painting․
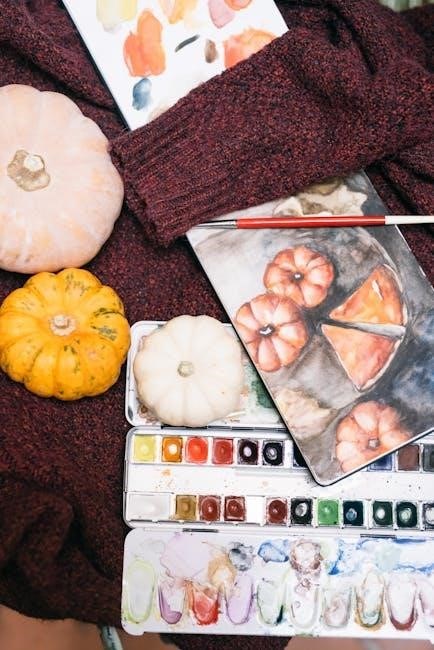
Watercolor Paints: Essential Colors for Pumpkins
When painting watercolor pumpkins, selecting the right colors is key to capturing their warm, autumnal hues․ Start with a palette of yellows, oranges, and reds, as these are fundamental for achieving the vibrant tones of pumpkins․ Cadmium Yellow and Goldenrod are excellent choices for the lighter undertones, while Burnt Sienna and Cadmium Red add depth and richness․ For shading and dimension, consider using cooler tones like Raw Umber or Sepia․ A touch of green can also be useful for painting stems or leaves․ Remember, watercolors blend beautifully, so layering these colors will create natural transitions and a lifelike appearance․ Experiment with mixing to find the perfect harmony for your pumpkin’s texture and glow․
Brushes: Selection for Different Techniques
Selecting the right brushes is crucial for achieving various watercolor techniques when painting pumpkins․ Round brushes are ideal for detail work, such as painting fine lines and small features like the pumpkin’s texture or stem․ Flat brushes are perfect for broad strokes and covering larger areas, making them great for base washes and blending․ A detail brush is essential for adding intricate details, while a mop brush is useful for soft blending and creating smooth transitions between colors․ For more expressive strokes, consider using Chinese calligraphy brushes, which add a unique, dynamic feel to your painting․ Each brush type serves a specific purpose, allowing you to explore different styles and effects in your watercolor pumpkin artwork․
Additional Tools: Sketching and Blending
Beyond brushes and paints, essential tools enhance your watercolor pumpkin painting experience․ A graphite pencil or sketching pen is vital for outlining your pumpkin design․ Blending tools like spray bottles or damp cloths help soften edges and create smooth transitions․ Masking fluid protects delicate areas from unwanted color․ Tissues or paper towels are handy for blotting excess water or correcting mistakes․ A mixing tray or palette aids in organizing colors and creating custom shades․ These tools complement your brushes, allowing you to achieve intricate details and subtle blends, ensuring your pumpkin painting is both expressive and refined․
Step-by-Step Guide to Painting a Watercolor Pumpkin
Learn to paint a watercolor pumpkin through a series of simple, detailed steps․ From sketching to adding final touches, this guide helps you create a vibrant, seasonal masterpiece․
Step 1: Sketching Your Pumpkin
Begin by lightly sketching your pumpkin onto watercolor paper using a graphite pencil or tracing paper․ Start with the basic shape, considering the pumpkin’s rounded form and gentle curves․ Add details like the stem and segment lines to create depth and structure․ Use reference images to ensure accuracy, or freehand for a more organic look․ Keep your sketch simple, as intricate details will be added later with paint․ This step is crucial for guiding your brushstrokes and ensuring proportions are balanced․ Once satisfied, gently erase any excess pencil marks to avoid visible lines in your final painting․ A clear sketch provides a solid foundation for your watercolor pumpkin․
Step 2: Applying the First Wash – Light Undertones
Start by applying a light wash to your pumpkin using a wet brush dipped in a pale yellow or gold watercolor paint․ This undertone establishes the base color and adds warmth to your pumpkin․ Paint each segment individually, following the natural curves of the fruit․ Use gentle, even strokes to cover the area, ensuring smooth coverage․ Avoid over-saturating the paper, as this can lead to buckling․ Allow the wash to blend softly where sections meet, creating a subtle transition․ This initial layer provides a foundation for building depth and dimension in subsequent steps․ Keep your brush moving in the direction of the pumpkin’s natural contours for a realistic effect․ This step sets the stage for adding richer colors and details later․
Step 3: Adding Depth with Darker Colors
Once the first wash is dry, enhance your pumpkin by adding deeper, richer shades to create dimension․ Mix a slightly darker orange or red tone and apply it to the top and bottom of each segment using a wet round brush․ Start at the edges and blend inward, allowing the colors to merge naturally․ This technique adds depth and gives the pumpkin a realistic, three-dimensional appearance․ Use gentle hatching strokes to follow the pumpkin’s contours, ensuring the darker colors settle where shadows would naturally fall․ Avoid over-saturating the brush, as this can cause the paint to bleed excessively․ Allow each layer to dry before adding more pigment to maintain crisp, defined edges․ This step is crucial for creating visual interest and realism in your watercolor pumpkin․
Step 4: Painting the Pumpkin Segments
Focus on painting each segment of the pumpkin individually to maintain clarity and definition․ Using a wet round brush, apply a light orange or yellow shade to one segment at a time, starting from the center and blending outward․ Allow the paint to flow naturally, leaving a thin line of negative space between each segment to create a realistic, ribbed texture․ Work sequentially, ensuring one segment is dry before moving to the next to prevent colors from bleeding․ This method allows for soft transitions and a cohesive appearance․ By painting each segment separately, you can control the shape and tone, resulting in a more dynamic and lifelike pumpkin․
Step 5: Adding Details – The Pumpkin Stalk
Add the finishing touches to your pumpkin by painting the stalk, a key detail that brings character to your artwork․ Using a fine brush, mix a green or brown color and carefully paint the stalk at the top of the pumpkin․ Ensure the pumpkin itself is dry before adding the stalk to avoid unintended color bleeding․ Paint in the direction of the stalk’s natural growth for a realistic appearance․ For a more natural look, blend the edges slightly where the stalk meets the pumpkin․ You can also add subtle shadows to the stalk using darker shades to give it depth and dimension․ This step completes the pumpkin’s structure, preparing it for final enhancements․
Step 6: Enhancing with Shading and Highlights
Elevate your watercolor pumpkin by adding shading and highlights to create depth and dimension․ Use a wet-on-dry technique to paint shadows, starting with lighter shades and gradually deepening the color for natural-looking contours․ Apply these shadows along the creases and ridges of the pumpkin, following the shape of each segment․ For highlights, use pure water or a light wash to lift areas where light would naturally reflect, such as the raised edges or tips of the pumpkin․ Blend gently with a damp brush to soften harsh lines․ This step enhances the three-dimensional appearance of your pumpkin, making it more lifelike and visually appealing․ Allow each layer to dry before adding more details to ensure crisp, defined results․
Step 7: Background and Negative Space
Add depth and context to your pumpkin painting by incorporating a background and utilizing negative space effectively․ Use soft, muted colors to paint the area around your pumpkin, ensuring it complements the pumpkin’s hues without overpowering them․ Apply light washes to create a subtle gradient or texture, leaving some areas untouched to maintain a sense of simplicity․ Negative space can enhance the pumpkin’s shape by highlighting its contours․ Allow the background to dry completely before painting the pumpkin to prevent unintended color bleeding․ For a cohesive look, consider adding faint foliage or textures in the background․ This step helps frame your pumpkin, making it the focal point of your artwork while adding visual balance to the composition․
Step 8: Final Touches and Allow to Dry
Complete your watercolor pumpkin by adding any remaining details, such as refining the stalk or enhancing shading․ Allow the painting to dry completely, ensuring no moisture remains․ Once dry, inspect the artwork for any areas needing touch-ups, gently addressing them with minimal strokes․ To protect your work, consider varnishing it once fully dry․ Avoid rushing this step, as patience ensures the paint sets properly․ This final step brings your pumpkin to life, capturing the essence of autumn with a delicate, watercolor charm․ Allow the artwork to dry thoroughly before handling or framing to preserve its beauty․
Advanced Techniques for Realism
Elevate your watercolor pumpkin painting with layering, blending, and negative painting․ These techniques add depth, dimension, and contrast, creating a more realistic and captivating autumn-themed artwork․
Layering Colors for Dimension
Layering colors is a fundamental technique for adding depth and dimension to your watercolor pumpkin․ Start with light, transparent washes to establish the base tones, then gradually build up richer, darker hues․ This approach allows you to create subtle shifts in color and value, giving your pumpkin a three-dimensional appearance․ Use glazing techniques to deepen oranges and reds, and experiment with wet-on-wet methods for soft, blended transitions․ Negative painting can also enhance dimension by carving out highlights and shadows around the pumpkin’s contours․ Remember, patience is key—allow each layer to dry before adding the next to avoid muddying the colors․ This method ensures a vibrant, lifelike finish․
Blending Techniques for Smooth Transitions
Blending techniques are essential for creating smooth, natural transitions in your watercolor pumpkin․ Wet-on-wet is a popular method where wet paint is applied to wet paper, allowing colors to merge effortlessly․ This technique is ideal for softening edges and blending adjacent sections of the pumpkin․ To achieve seamless transitions, start with light washes and gradually deepen the colors․ Use a damp brush to pick up and blend pigment, creating gentle shifts in tone and value․ For harder edges, allow the initial layer to dry slightly before adding darker shades․ Glazing, or layering transparent washes, can also enhance blending by richening colors without disrupting the underlying structure․ These methods ensure your pumpkin appears lifelike and cohesive․
Using Negative Painting for Contrast
Negative painting is a powerful technique for adding contrast and depth to your watercolor pumpkin․ By painting around the pumpkin’s contours and details, you create highlights and shadows that define its shape․ Start by painting the background or surrounding areas with soft washes, allowing the white of the paper to shine through for natural highlights․ Use a damp brush to remove excess pigment and create subtle shifts in tone․ For intricate details like the pumpkin’s texture or stalk, paint around them with a small brush, letting the unpainted areas stand out․ This method enhances the illusion of dimension and draws attention to the pumpkin’s features without directly painting every detail․ Allowing each layer to dry ensures crisp, clean contrast․
Tips for Beginners
Start with simple shapes and light washes․ Practice basic watercolor techniques first․ Sketch your pumpkin lightly, use reference images, and keep your first layer light for easy blending․
Relax and Embrace Imperfections
Embracing imperfections is key to enjoying watercolor pumpkin painting․ Remember, watercolor is unpredictable, and its fluidity often leads to unique, organic results․ Don’t stress over mistakes—instead, view them as part of the process․ Loosen up and allow the paint to flow naturally․ Overworking can ruin the freshness of your painting, so let go of perfection․ Focus on capturing the essence of the pumpkin rather than achieving flawless details․ Celebrate the spontaneous effects of watercolor, as they often add character to your artwork․ Practice mindfulness and enjoy the creative journey, knowing that imperfections make your piece truly original and personal․
Practice Basic Watercolor Skills First
Mastering basic watercolor techniques is essential before diving into pumpkin painting․ Start by practicing simple exercises like wet-on-wet, wet-on-dry, and flat washes to understand how water and pigment interact․ Learn to mix colors and create harmonious palettes, as this will help you achieve natural transitions in your pumpkin’s texture and shading․ Familiarize yourself with different brushstrokes to control lines and details effectively․ Building these foundational skills will make your pumpkin painting process smoother and more enjoyable․ By practicing the basics, you’ll gain confidence and precision, allowing you to focus on capturing the unique character of your pumpkin in watercolor․
Watching Tutorial Videos for Guidance
Watching tutorial videos is an excellent way to gain practical insights and confidence in watercolor pumpkin painting․ Many artists share step-by-step demonstrations on platforms like YouTube, offering clear guidance on techniques such as layering, blending, and shading․ These videos often cover essential topics like color mixing, brushstroke control, and managing water-to-paint ratios․ By observing how experienced artists approach their work, you can learn tips for creating smooth transitions, avoiding common mistakes, and adding fine details like pumpkin segments and stems․ Tutorial videos also provide real-time examples of how to handle challenges, making the learning process more intuitive and enjoyable․ They are a valuable resource for both beginners and those refining their skills․
Common Mistakes and How to Fix Them
- Over-saturating the paper can cause buckling; fix by using less water or allowing layers to dry․
- Mixing colors too harshly leads to mud; blend gently and test colors first․
- Not letting layers dry results in muddied colors; wait patiently between layers․
Over-Saturating the Paper
Over-saturating the paper is a common mistake that can lead to buckling or uneven washes․ This often happens when too much water is applied or layers are added before the previous one dries․ To fix this, gently blot excess moisture with a clean paper towel or allow the paper to dry completely between layers․ Using high-quality, heavy-weight watercolor paper can also help prevent buckling․ Avoiding over-saturation ensures smoother blending and maintains the integrity of your pumpkin painting․ Patience is key—let each layer dry before moving on to the next to achieve crisp, vibrant colors in your artwork․
Mixing Colors Too Harshly
Mixing colors too harshly can result in muddy, unappealing shades that detract from the natural beauty of your watercolor pumpkin․ To avoid this, blend colors gently and gradually, allowing each layer to merge softly․ Avoid over-mixing on the palette, as this can create dull, lifeless hues․ Instead, mix colors directly on the paper with light, delicate strokes․ For pumpkin tones, start with light yellow or orange and gradually add depth with darker shades, ensuring each layer is soft and subtle․ Always test your color mixtures on a separate sheet before applying them to your final piece․ This approach will help maintain the vibrancy and transparency that watercolor painting is known for․
Not Allowing Layers to Dry
One common mistake in watercolor pumpkin painting is not allowing layers to dry completely before adding new ones․ This can cause colors to bleed or mix unintentionally, muddying the delicate appearance of your pumpkin․ To avoid this, always wait for each layer to dry fully before proceeding․ Watercolor relies on layering to achieve depth and luminosity, so patience is key․ If you rush this process, the transparency and clarity of your painting may suffer․ Instead, work gradually, allowing each wash to set before adding darker shades or details․ This approach ensures crisp, defined layers and a professional finish․ It’s a simple yet crucial step for achieving a vibrant, realistic pumpkin․
Celebrate your progress and embrace the joy of creating․ Each brushstroke is a step forward, so keep practicing, experimenting, and enjoying the process of watercolor pumpkin painting․
Celebrate Your Progress
Celebrate Your Progress
Celebrating your progress is essential to fostering creativity and motivation․ Embrace each painting as a unique expression of your artistic journey, no matter the outcome․ Even small improvements are worth acknowledging, as they reflect growth and dedication․ Share your work with others, whether online or in person, to gain confidence and inspiration․ Remember, watercolor pumpkin painting is not just about technique but also about enjoying the process․ By celebrating your efforts, you encourage yourself to continue exploring and refining your skills․ Every brushstroke brings you closer to mastering this beautiful medium, so take pride in the progress you’ve made and the joy it brings to your life;
Keep Practicing and Experimenting
Consistent practice is key to mastering watercolor pumpkin painting․ With each session, you’ll refine your skills and develop a deeper understanding of color, technique, and composition․ Experimentation is equally important—try new brushes, color palettes, and methods to discover what works best for you․ Don’t be afraid to step out of your comfort zone; it’s often where the most exciting discoveries happen․ Remember, every painting is a learning opportunity․ By dedicating time to practice and embracing experimentation, you’ll continue to grow as an artist․ The journey of learning is just as rewarding as the final result, so keep exploring and enjoying the process of creating beautiful watercolor pumpkins․